starting from June 2023 code signing certificates for MS Windows cannot be delivered as a file anymore. files are easy to steal. now certs must reside on security modules which don’t allow private key extraction, at least not for mere mortals.
we’re using such a cert to sign exe and msi files on a build server which is a VM running Server version of MS Windows. below – details how to get a new cert and make it work in such CI/CD environment.
i’ve done some googling and found few resouces:
- HN: The Windows installer of ImageMagick will no longer be signed
- Notes on signing code with your own hardware (Yubikey)
- Code Signing with USB Tokens
- How to code sign Windows installers with an EV cert on GitHub Actions
- another discussion
- code signing with yubikey on windows [ no mention of automatization ]
- automating EV code signing with yubikey
looks like cloud-based signing is ‘the easy way’, but we wanted to avoid it for multiple reasons, including security and costs. few of the offers:
- https://store.entrust.com/default/ov-ev-code-signing-as-a-se…
- https://www.digicert.com/content/dam/digicert/pdfs/datasheet…
purchases
- i’ve bought Organization Validation Code signing certificate from ssl.com. website is sketchy, i even got errors in the process but their support was responsive and i got vetted [ i have proven that i am acting on behalf of the company for which i’ve ordered the cert ] within few days:
- i had to provide registration papers,
- i also gave DUNS number to speed things up,
- they made automated call to number visible in D&B records, i had to re-type the number provided over the phone to their website,
- separately – i’ve bought Yubikey 5 Nano FIPS – to be sure that i’m generating the private key and it’s not known to anyone else.
finalizing the cert issuance
- based on https://www.ssl.com/how-to/key-generation-and-attestation-with-yubikey/ i’ve generated private key on the newly bought Yubikey 5 Nano FIPS:
- in the process i’ve set my own PIN, PUK and Management key for Yubikey via Yubikey Manager,
- in Yubikey Manager i’ve generated code signing certificate in slot 9a, with ECC P384 private key, then – following instruction above – i’ve created attestation file [ proving that private key was created on Yubikey device ] and intermediate certificate,
- I’ve provided both of above to ssl.com and waited for them to issue the certificate,
- once i got the certificate – i’ve imported it together with intermediate and root cert of ssl.com to yubikey [ based on https://www.ssl.com/how-to/install-sslcom-root-and-intermediate-certificates-on-yubikey/ ],
- i’ve installed yubikey’s smartcard minidriver and rebooted my pc,
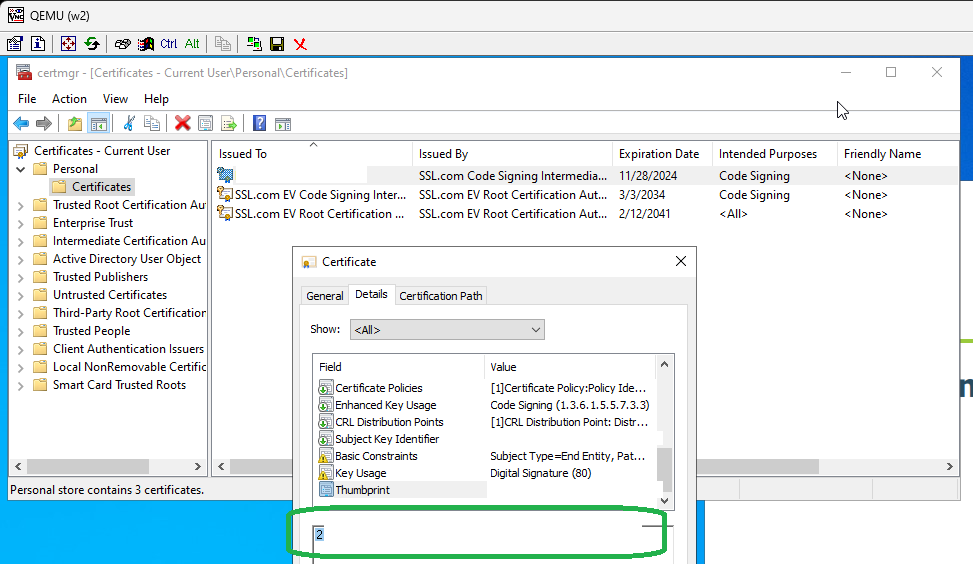
- after that the new certificate showed up in certmgr.msc > personal > certificates – good!
testing if the certificate works
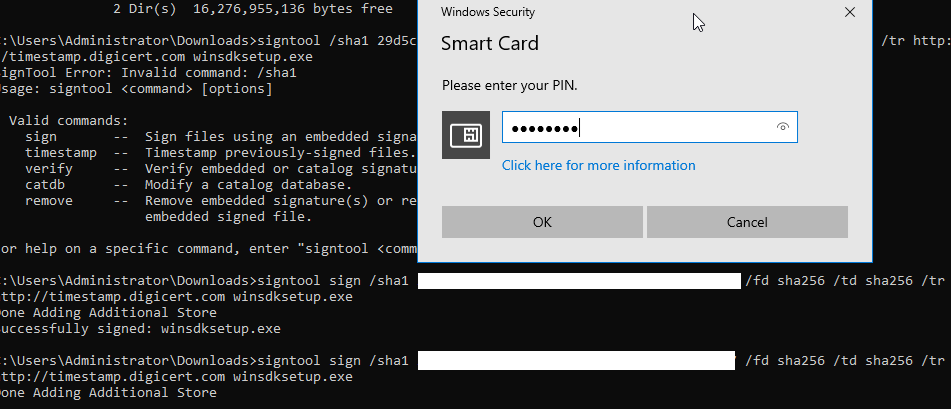
- i’ve installed signtool from https://developer.microsoft.com/en-us/windows/downloads/windows-sdk/
- i was able to successful sign an exe with signtool.exe sign /sha1 2ad5caaad3caf23baa33a2ad7a6eaaf18255a7c7 /fd sha256 /td sha256 /tr http://timestamp.digicert.com “Clear Settings Wizard.exe” where the long hex string is a thumbprint of my new certificate, it can be found in certmgr.msc > personal > certificates.
setting up VM with Windows Server
qemu-img create -f qcow2 vda.qcow2 32G
virt-install --connect qemu:///system --arch=x86_64 -n w2 -r 6144 --vcpus=4 --cdrom ../win2022/SERVER_EVAL_x64FRE_en-us.iso --disk path=vda.qcow2 --disk path=../win2022/virtio-win.iso,device=cdrom --graphics vnc,listen=127.0.0.1,port=5907 --noautoconsole --os-type windows --os-variant=win2k16 --network=bridge:br0,model=virtio --accelerate --noapic

# windows iso taken from https://www.microsoft.com/en-us/evalcenter/download-windows-server-2022
# virtio-win drivers taken from the latest build at https://fedorapeople.org/groups/virt/virtio-win/direct-downloads/archive-virtio/
i’ve continued the setup via VNC available on loopback of my linux box, on port 5907
once system was installed – i’ve:
- installed virtio drivers from the ISO file – by running virtio-win-gt-x64.msifrom it
- run windows updates and rebooted the Windows Server VM few times
- enabled RDP access
passing USB device from physical server to Windows VM
i’m working with assumption that only one yubikey will be plugged into physical server – so it’s enough find out identifier of the USB token that i want to pass to Windows VM:
lsusb -v|less
# i'm searching for Yubico
Bus 001 Device 002: ID 1050:0404 Yubico.com Yubikey 4/5 CCID
Device Descriptor:
  bLength                18
  bDescriptorType         1
  bcdUSB               2.00
  bDeviceClass            0
  bDeviceSubClass         0
  bDeviceProtocol         0
  bMaxPacketSize0        64
  idVendor           0x1050 Yubico.com
  idProduct          0x0404 Yubikey 4/5 CCID
  bcdDevice            5.43
  iManufacturer           1 Yubico
  iProduct                2 YubiKey CCID
  iSerial                 0
that’s the key part: idVendor=0x1050, idProduct=0x0404. i’ve put them to the /etc/libvirt/qemu/w2.xml – definition of my VM, in <devices> section
<hostdev mode='subsystem' type='usb' managed='yes'>
  <source>
    <vendor id='0x1050'/>
    <product id='0x0404'/>
  </source>
  <address type='usb' bus='0' port='2'/>
</hostdev>
then virsh define /etc/libvirt/qemu/w2.xml and virsh start w2.
from now on – use VNC and not RDP to connect to the Windows VM. Why? Because RDP, intentionally, makes it impossible to access smartcard/security devices that are attached to Windows machine to which you’re connecting.
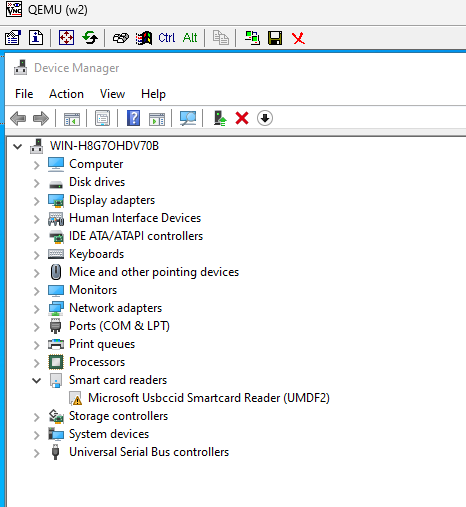
in the device manager of Windows i can see the smartcard device, with a warning – that’s a good sign:
if you have more than one identical yubikey plugged into the physical server and want to pass just one of them – it’s possible to pass whatever is attached to a specific port.
making Yubikey actually work on the Windows VM
- install Yubikey’s minidriver for windows 64 bit
- install Yubikey Manager
- reboot the Windows VM
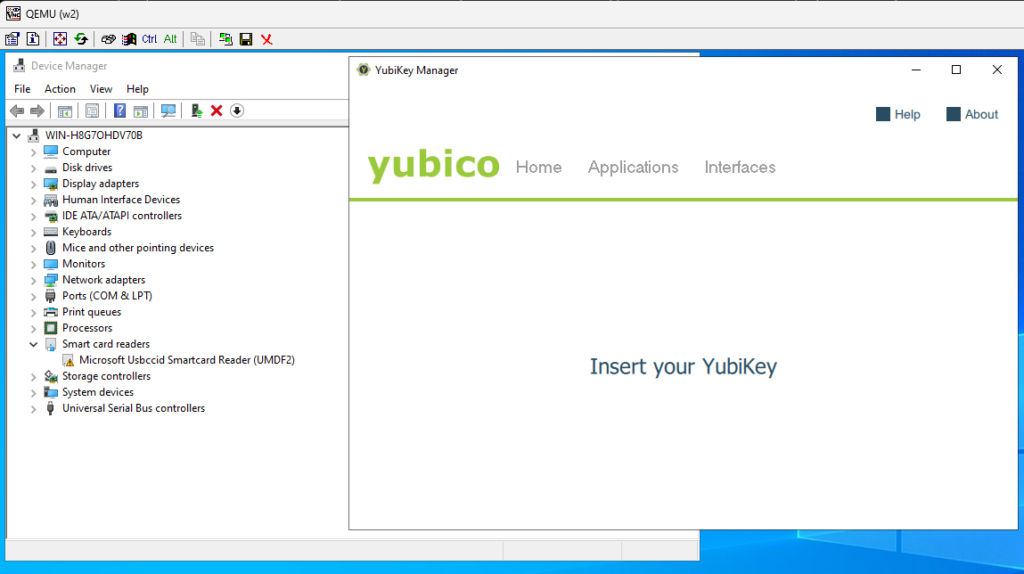
- at this stage – yubikey manager will not see the key and will tell insert your yubikey
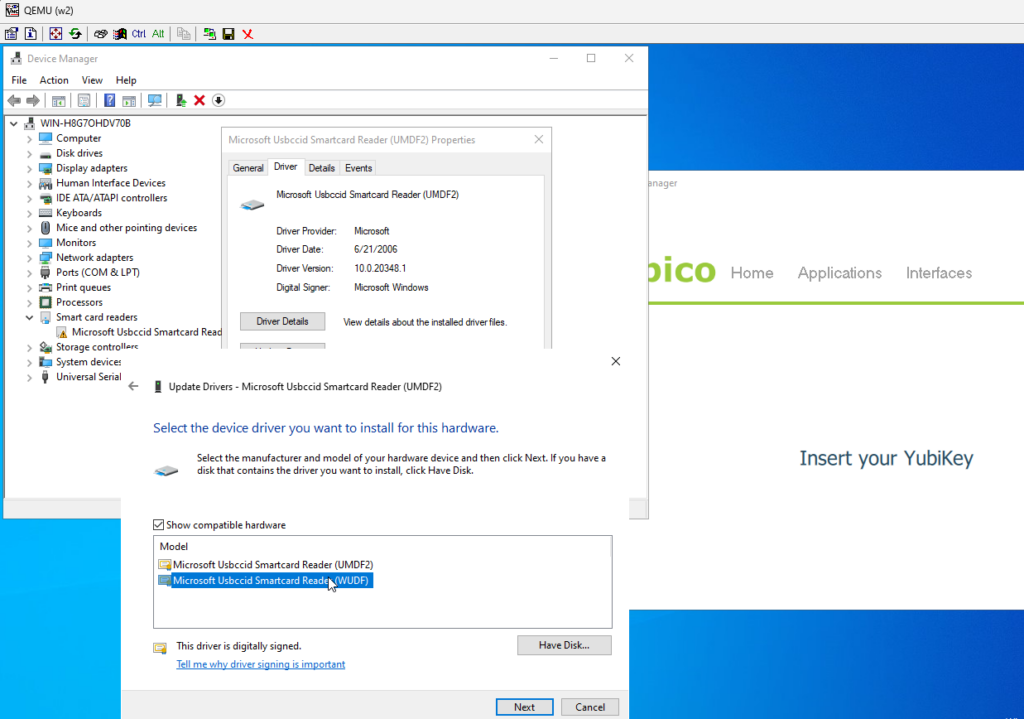
- now the key part – based on this thread – in the Device Manager – double blick on the Microsoft Usbccid Smartcard Reader (UMDF2) go to Driver > Update Driver, Browser my computer for drivers Let me pick from a list of available drivers on my computer and select Micrososft Usbccid Smartcard Reader (WUDF)
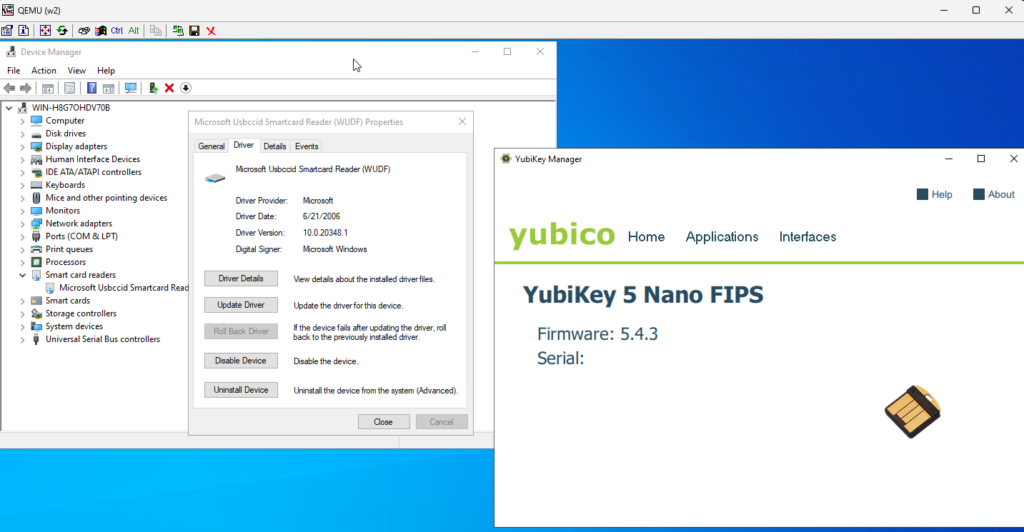
Yubikey token should immediately show up in the Yubikey Manager:
signing a binary in the Windows VM
install signtool from https://developer.microsoft.com/en-us/windows/downloads/windows-sdk/ – it’s enough to select Windows SDK Signing Tools for Desktop Apps
run certmgr.msc , find your certificate, double click on it, go to Details and scroll down to the Thumbprint – it’s the hash we’ll use to identify cert that should be used in the signing process
add c:\Program Files (x86)\Windows Kits\10\bin\10.0.22621.0\x64 to path to make signtool easily accessible from command line, providing – as the long hex – thumbprint of your cert:
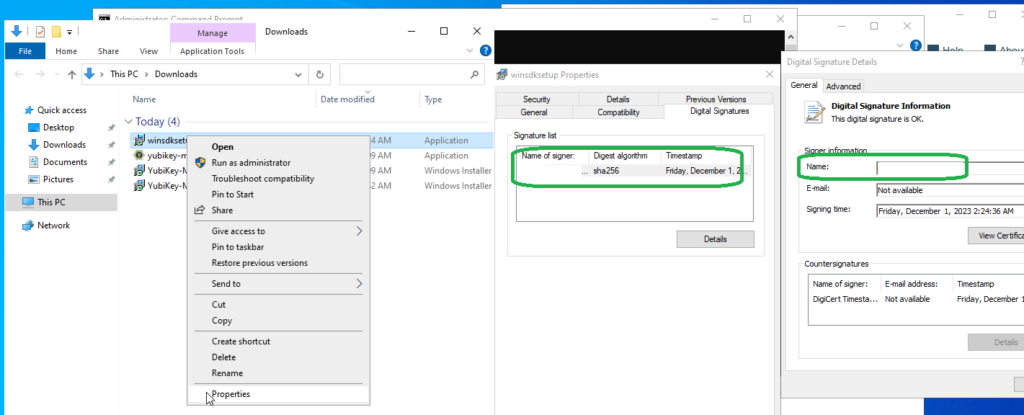
signtool.exe sign /sha1 2ad5caaad3caf23baa33a2ad7a6eaaf18255a7c7 /fd sha256 /td sha256 /tr http://timestamp.digicert.com “Clear Settings Wizard.exe”
if all went fine – signature on the exe should be replaced with yours
again – above will not work if you RDP – yubikey manager will tell Insert your YubiKey, signtool will ask to select a smartcard device, and tell “No certificates were found that met all the given criteria”.
signing without need to manually enter the PIN each time
I’ve found few options for unattended / fully automated signing, without prompt for pin, with Yubikey:
- scsigntool – https://www.mgtek.com/smartcard – free, but closed source and fairly obscure. seems to work fine, but i’d prefer to have more transparency
- https://ebourg.github.io/jsign/ – which requires Java and seems to work fine; you’ll need to install Yubico-piv-tools and add C:\Program Files\Yubico\Yubico PIV Tool\bin to PATH.
- osslsigncode might support it, i did not try. details: 1, 2.
java -jar jsign-5.0.jar -tsaurl http://timestamp.sectigo.com --storetype YUBIKEY --storepass MYPIN --replace yubico-piv-tool-2.3.1-win64.msi
ERROR StatusLogger Log4j2 could not find a logging implementation. Please add log4j-core to the classpath. Using SimpleLogger to log to the console...
Adding Authenticode signature to yubico-piv-tool-2.3.1-win64.msi
i’m sure it’s possible to specify which cert to use, but i don’t know how to do it. anyway – this seems to work.
reminder: access to local smartcard is not possible via RDP, i was getting this error when trying to use jsign via RDP instead of VNC:
jsign: Failed to load the keystore
java.security.KeyStoreException: keystore type 'YUBIKEY' is not supported with security provider SunPKCS11-yubikey
        at net.jsign.KeyStoreType.getKeystore(KeyStoreType.java:474)
        at net.jsign.KeyStoreBuilder.build(KeyStoreBuilder.java:283)
        at net.jsign.SignerHelper.build(SignerHelper.java:256)
        at net.jsign.SignerHelper.sign(SignerHelper.java:388)
        at net.jsign.JsignCLI.execute(JsignCLI.java:132)
        at net.jsign.JsignCLI.main(JsignCLI.java:40)
Caused by: java.security.KeyStoreException: PKCS11 not found
        at java.base/java.security.KeyStore.getInstance(KeyStore.java:967)
        at net.jsign.KeyStoreType.getKeystore(KeyStoreType.java:469)
        ... 5 more
Caused by: java.security.NoSuchAlgorithmException: no such algorithm: PKCS11 for provider SunPKCS11-yubikey
        at java.base/sun.security.jca.GetInstance.getService(GetInstance.java:101)
        at java.base/sun.security.jca.GetInstance.getInstance(GetInstance.java:218)
        at java.base/java.security.Security.getImpl(Security.java:684)
        at java.base/java.security.KeyStore.getInstance(KeyStore.java:964)
        ... 6 more
Try `java -jar jsign.jar --help' for more information.
looks like there’s a way around it, but requires binary patching: 1, 2, 3.
Extended Validation code signing certificates
few weeks after buying OV Code Signing cert from ssl.com and testing if all works fine i’ve bought proper EV certs to be used in the next 3 years – one from ssl.com another from sectigo via ssl2buy.com. vetting process was very similar for both OV and EV certs – it was based on call to number found in company registration papers. installation and use of EV certs was identical to OV. in case of sectigo besides getting the requested cert, i’ve received two intermediary certs and root cert. i’ve installed them via:
cd C:\Program Files\Yubico\YubiKey Manager
ykman.exe piv certificates import 82 C:\sectigo\out\root.crt -m managementkey
ykman.exe piv certificates import 83 C:\sectigo\out\int1.crt -m managementkey
ykman.exe piv certificates import 84 C:\sectigo\out\int2.crt -m managementkey